Setup AWS IAM/VPC
Set up AWS and upload your Docker image
Step 1: Set up an AWS account and create required resources.
1.1 Sign up for an AWS account:
If you don’t have an AWS account, sign up for one. You’ll need to provide an email address, password, and payment information. AWS offers a free tier, so you shouldn’t incur any charges for this project if you stay within the free tier limits.
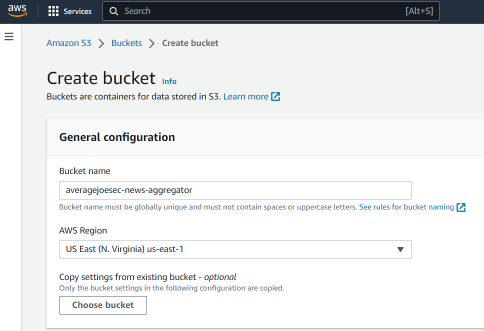
1.2 Create an Amazon S3 bucket:
We will use Amazon S3 to store the application code and Docker images. To create an S3 bucket, follow these steps:
Sign in to the AWS Management Console and open the Amazon S3 console. Click “Create bucket”. Enter a unique name for your bucket, choose a region, accept all other defaults, and click “Create bucket”.
Upload your Flask application code (including the ‘index.html’ template) to the newly created bucket.

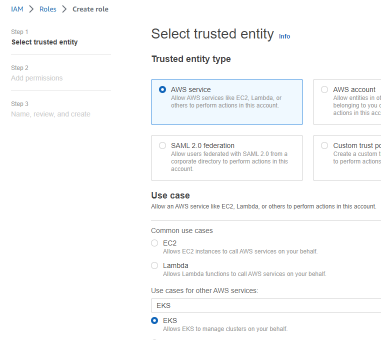
1.3 Set up IAM roles and policies:
Create an IAM role and attach policies to it that grant the necessary permissions for your AWS services.
Open the IAM console. In the navigation pane, click “Roles” and then “Create role”. Click the drop down for ‘Use case’ and choose EKS.
Accept all defaults and hit ‘Create role’
1.4 Create a Virtual Private Cloud (VPC):
A VPC is necessary to run your Amazon EKS cluster. You can either use the default VPC that comes with your AWS account or create a new one.
Open the VPC console. Click “Create VPC” , select ‘VPC only’, enter a Name tag, CIDR block, and accept all other defaults.
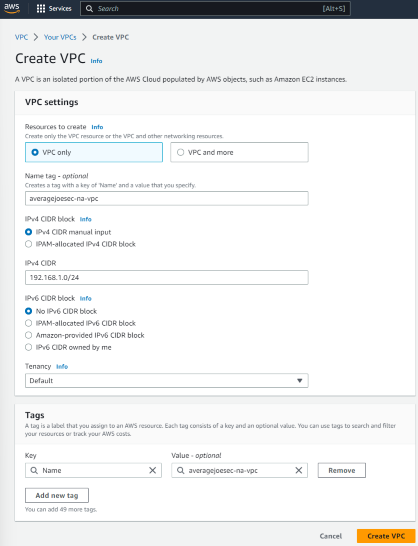
Click “Create VPC”.
1.5 Set up AWS CLI:
Install and configure the AWS CLI on your local machine to interact with AWS services. Follow the instructions to install the CLI and configure it with your AWS account credentials.
Step 2: Prepare for Kubernetes and AWS EKS deployment.
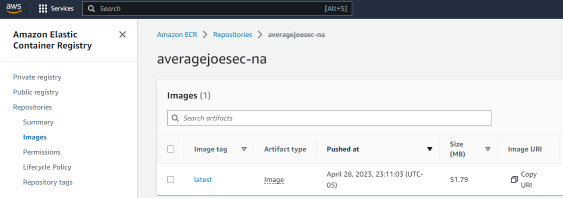
2.1 Push the Docker image to Amazon Elastic Container Registry (ECR):
We will use the Docker image created in the previous project for your Kubernetes cluster.
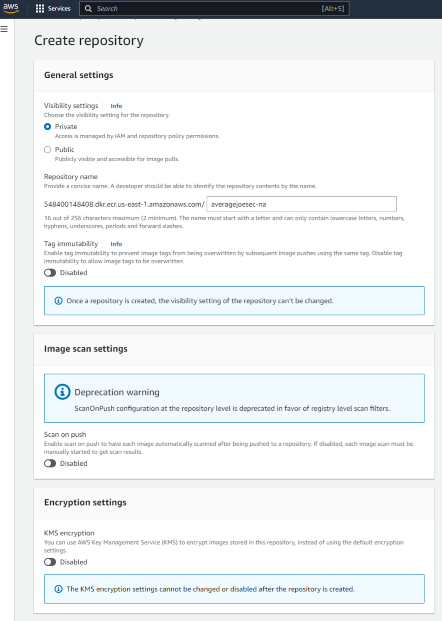
Create an ECR repository in the AWS Management Console: Open the ECR console, click “Get Started”, enter a name for your repository, accept all defaults, and click “Create repository”.
2.2 Authenticate your Docker client to the Amazon ECR registry.
Lets authenticate your Docker client to an Amazon Elastic Container Registry (ECR) by generating an authentication token. This token can be used with the Docker CLI to push and pull images from the ECR registry. The token is valid for 12 hours.
To use the get-login-password command for this project, follow the steps below:
Retrieve the authentication token using the get-login-password command.
Replace <region> with the AWS region where your ECR repository is located:
aws ecr get-login-password --region <region>
The command will return an authentication token.
Authenticate your Docker client to the Amazon ECR registry using the token.
Replace <aws_account_id> and <region> with your AWS account ID and the region where your ECR repository is located:
aws ecr get-login-password --region <region> | docker login --username AWS --password-stdin <aws_account_id>.dkr.ecr.<region>.amazonaws.com
This command will pipe the output of the get-login-password command to the docker login command, and your Docker client will be authenticated to the ECR registry.
2.3 Tag your Docker image with the ECR repository URI.
Replace <aws_account_id>, <region>, and ‘
docker tag flask-news-aggregator:latest <aws_account_id>.dkr.ecr.<region>.amazonaws.com/<repository-name>:latest
Push your Docker image to the ECR repository. Use the same values for <aws_account_id>, <region>, and ‘
docker push <aws_account_id>.dkr.ecr.<region>.amazonaws.com/<repository-name>:latest